


Installation…

DO NOT USE TOOLS TO INSTALL: While FLUX Vents are engineered with industrial grade durability, do not use vice grips or adjustable wrenches to secure the vent to the battery. This could result in permanent damage and an increased safety hazard. Only install by hand.

ALWAYS WEAR PROPER PPE GEAR: When watering or checking batteries always wear the required P.P.E. gear including gloves, eye covering and acid resistant clothing. Skin and eye exposure to liquid acid electrolyte is possible.
1) Make sure batteries are charged and watered….
Before installing either the FLUX1000 or FLUX2000 make sure to charge each battery to recommended manufacturer levels. Once charged, add water to the cell bringing the water level up to the high line.
2) Remove existing battery vents
One cell at a time, remove the existing manufacturer installed flame arresting vents. Set vents aside in a plastic or glass container to prevent corrosion or burns from acidic electrolyte. If you can not install FLUX Vents immediately, cover cell opening to prevent debris from entering the cell.
3) Neutralize old vents before storage
Its always a good idea to save at least a few of the existing vents in the event you need them down the road. Once the old vents have been removed, we recommend neutralizing the original vents before storing or discarding. Neutralize with an off the shelf PH color changing battery acid neutralizing spray like:
Acid Eater
PIG Brand Neutralizing Spray
Zep
Oil-Dri
Nu-Calgon
If a commercial neutralizing agent is not available, you can use a simple combination of baking soda and water. Use a (10%) solution comprised of 100g of baking soda to 1 liter of distilled water. Soak vents for a minimum of 15 minutes. Once neutralized, rinse well to remove any residual agent left on the vent.
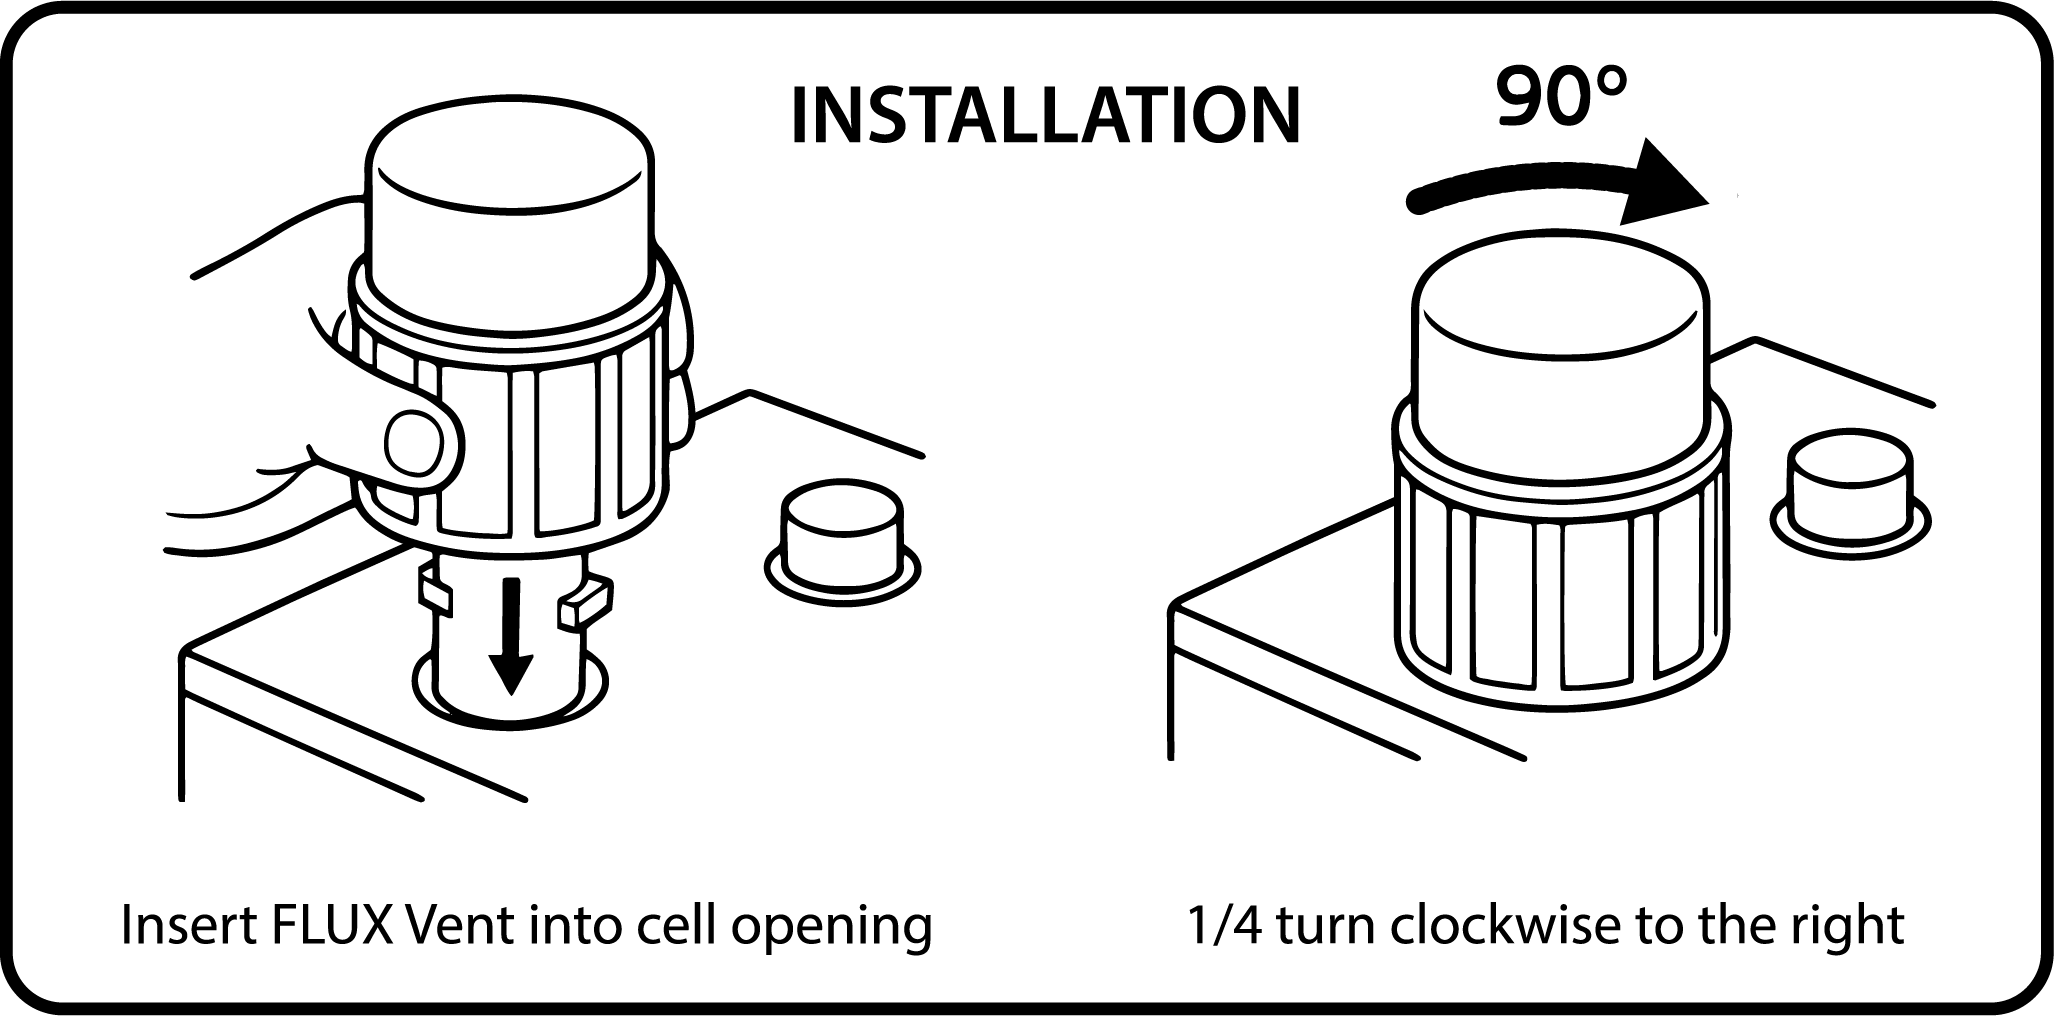
4) Installing FLUX Vents
With the old vent removed, place one FLUX Vent into the cell opening.
Turn the FLUX Vent 1/4 turn (90 degrees) clockwise to lock the vent into the battery’s bayonet tabs.
> The vent should stop once the bayonet tabs are fully engaged.
> The FLUX Vent should be tight in order to create a good seal between the vent and the cell opening.
> With slight pressure try turning the FLUX vent counter clockwise, if the vent dislodges or moves, re-tighten.
5) Removing FLUX Vents
When adding water to the cell, simply rotate the vent counter clockwise 90 degrees to disengage the bayonet tabs
With the bottom portion of the FLUX Vent still in the vent well tube, lightly tap against the inner lip of the cell opening. This tapping motion will help drain any electrolyte droplets that remain in the vent back into the cell. Continue this until there is no longer electrolyte dripping from the bottom of the vent.
You are now free to lay the vent on its side or stand upright by its base.
